Living in a studio apartment means every square foot has to pull its weight, and nowhere is that more true than the kitchen. Whether you are working with a narrow galley, a tucked-away corner, or a single open wall, a compact kitchen does not have to feel like a compromise. With the right layout choices, smart storage solutions, and a few clever visual tricks, small studio kitchens can be just as functional and beautiful as a full-sized one.
This guide walks you through 14 practical, design-forward ideas that real urban dwellers and interior designers use to make compact cooking spaces work harder, look better, and feel bigger. From nook kitchens to glossy backsplashes, every tip here is built for real apartments and real budgets.
Tuck the Kitchen Into a Nook
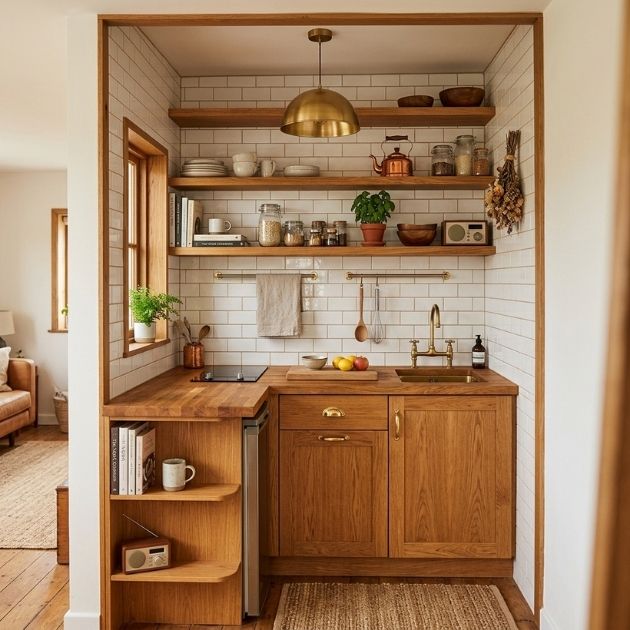
One of the most space-efficient strategies for a studio layout is building the entire kitchen inside a recessed nook or alcove. These natural cutouts, often found near hallways, closets, or under staircases, are the perfect footprint for a compact kitchen zone. Because the walls wrap around three sides, you get vertical storage on every surface without the kitchen bleeding into your living area.
Keep the cabinets flush with the surrounding walls so the kitchen disappears when you want it to. Paint the inside of the nook the same color as the rest of the studio for a seamless, cohesive effect. Add a full-height pantry cabinet on one side to make the most of the ceiling height.
Give these a look:
- Peel-and-stick subway tile panels for a quick renter-friendly backsplash inside the nook
- Compact two-burner induction cooktops that sit flush on the counter
- Magnetic knife strips and wall-mounted spice rails to keep counters clear
- Foldable cabinet door panels that tuck flat when the kitchen is not in use
Read This: 14+ Stylish Corner Bar Ideas for Small Spaces
Go With a Single-Wall Layout
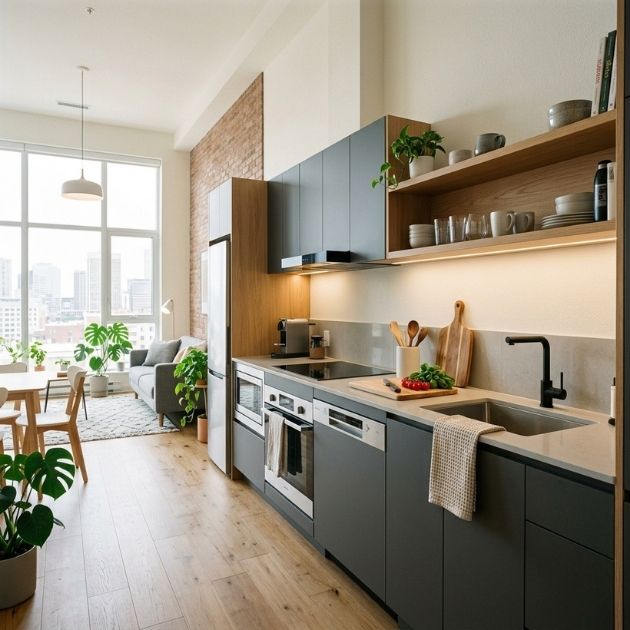
When square footage is limited, spreading the kitchen across multiple walls often creates traffic problems and wasted corners. A single-wall kitchen, where the sink, cooktop, and refrigerator all line up along one wall, keeps sightlines clean and leaves the rest of the studio open for living and dining.
This layout works especially well in long, narrow studio apartments. Pair it with tall, floor-to-ceiling cabinetry on either side to compensate for the reduced base cabinet count. A rolling prep cart can serve as extra counter space during meal prep and roll away when not needed.
Explore these options:
- Slim 18-inch or 24-inch base cabinets that fit tight against the wall
- A floor-to-ceiling pantry tower with pull-out shelves
- Wall-mounted fold-down side shelf for occasional extra prep space
- A compact two-door refrigerator in a finish that matches cabinetry
Swap Uppers for Open Shelves
Upper cabinets are useful but they close off the wall visually and make small kitchens feel like a box. Replacing some or all of them with open floating shelves immediately opens up the space, adds an airy feel, and puts your most-used items within easy reach.
The key is to treat the shelves like a display, not a dumping ground. Group similar items together, use matching containers for dry goods, and keep only what you reach for daily on the lower shelves. This approach, widely favored in Scandinavian and minimalist kitchen design, makes a small kitchen feel intentional and curated.
Some ideas to consider:
- Solid wood floating shelves with invisible wall brackets for a clean look
- Uniform white or clear glass canisters to store pantry staples attractively
- A small plant or two on the top shelf to add warmth without clutter
- Under-shelf hooks to hang mugs and free up shelf space
Create a Skinny Breakfast Bar
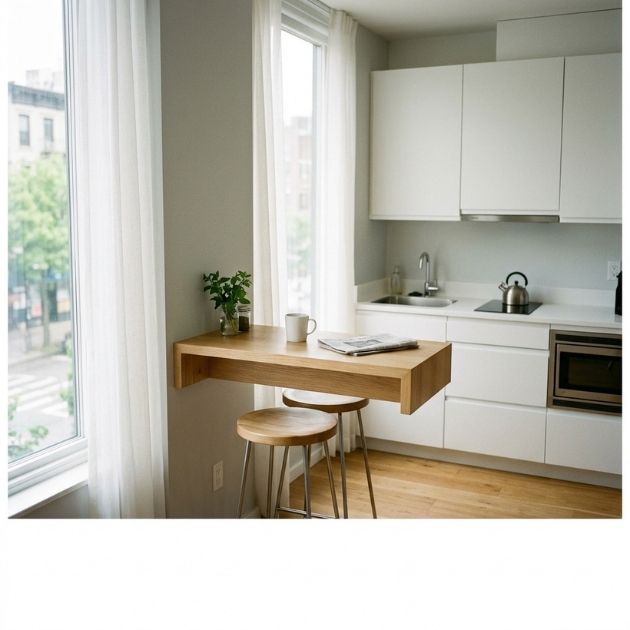
Dedicated dining tables take up valuable floor space in a studio. A wall-mounted breakfast bar, typically no deeper than 10 to 12 inches, gives you a functional eating spot, a quick work surface, and a visual divider between the kitchen zone and the living area, all without adding bulk.
Mount it at counter height and pair it with one or two slim bar stools that slide fully underneath when not in use. This single move can eliminate the need for a separate dining table entirely, freeing up several square feet in the process.
Try these:
- A wall-mounted fold-down solid wood breakfast bar that folds flat when not needed
- Backless bar stools with a stackable or slim profile
- A narrow wall-mounted bar shelf with a lip to keep items from sliding
- Industrial-style pipe brackets for a budget-friendly DIY version
Read This: 12+ Smart Twin Bed Ideas for Adults in Small Spaces
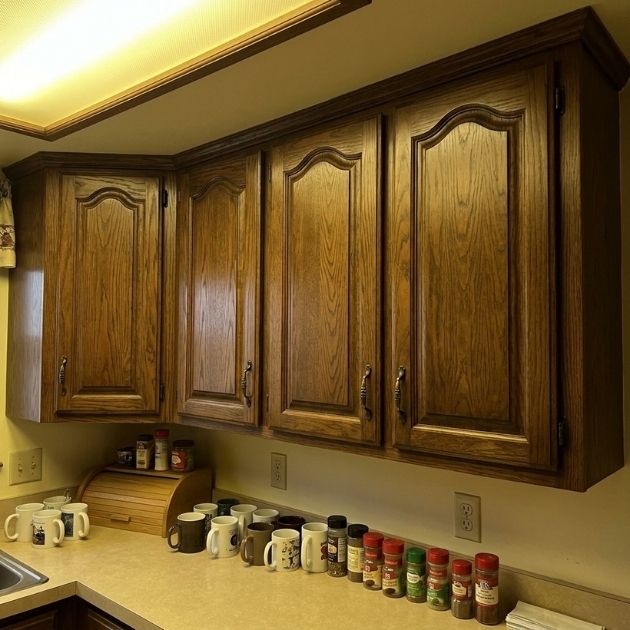
Try Two-Tone to Keep It Light
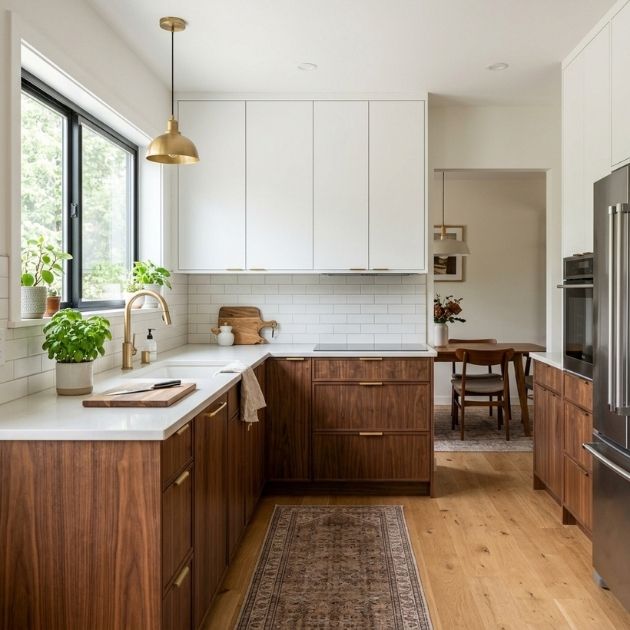
All-dark or all-light cabinetry each come with trade-offs in a compact kitchen. A two-tone approach, lighter uppers paired with slightly darker or wood-toned lowers, gives the space visual depth and makes the ceiling feel higher by drawing the eye upward.
This technique is popular in urban kitchen design because it defines different zones without physical barriers. White or cream upper cabinets keep the space bright, while muted navy, sage green, or warm wood lowers add personality without making the room feel heavy.
May just do the trick:
- Ready-to-assemble flat-front cabinets available in two complementary finishes
- Peel-and-stick contact paper in wood grain to update lower cabinet doors affordably
- Brushed brass or matte black hardware to tie both tones together
- A matching two-tone kitchen cart to extend the look into the room
Add Slim Rails Under Shelves
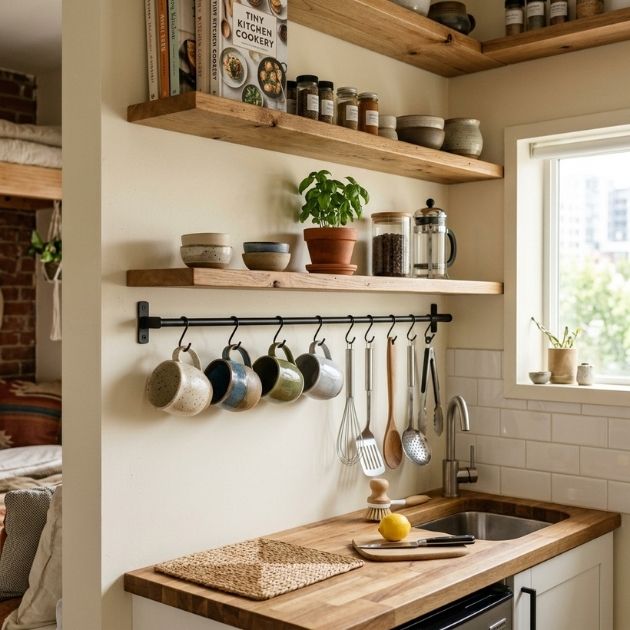
The space directly under a shelf or upper cabinet is often left unused. A simple horizontal rail mounted there instantly creates a hanging zone for small tools, utensils, mugs, paper towels, or even small baskets, effectively adding a new layer of storage without touching the walls or counter.
These rails are especially useful below open shelves in a studio kitchen where cabinet space is minimal. They keep frequently used items accessible and off the countertop, which is the single most important real estate in any compact cooking space.
A few helpful options:
- Stainless steel rails with S-hooks in a variety of widths to fit most shelf spans
- Matte black versions for a more modern or industrial look
- Adhesive-mount mini rails that work without drilling for renters
- Expandable tension rod organizers as a no-damage alternative
Make the Backsplash Do More
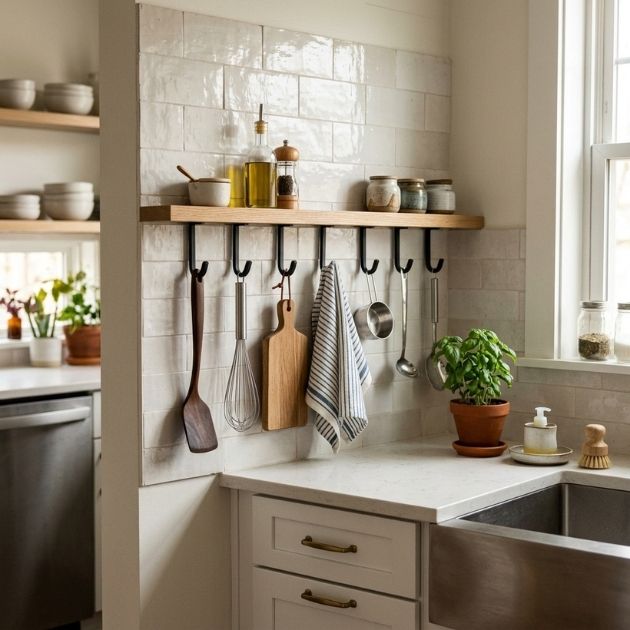
In most kitchens, the backsplash just protects the wall. In a studio kitchen, it can also function as a storage system. Pegboard-style backsplashes, tile-mounted rail systems, and magnetic backsplash panels let you hang frequently used items directly on the wall behind the cooktop or sink.
This turns dead vertical space into an active storage zone without adding any depth to the kitchen footprint. It also keeps your counters clear, which makes a small kitchen feel significantly more open.
Might be a good match:
- A magnetic knife bar mounted directly on a steel or magnetic-finish backsplash panel
- Peel-and-stick mosaic tiles for a renter-friendly backsplash refresh
- A rail system with interchangeable hooks, shelves, and container attachments
- Mirror-finish tile panels that also reflect light and add depth
Install Under-Shelf Task Lighting
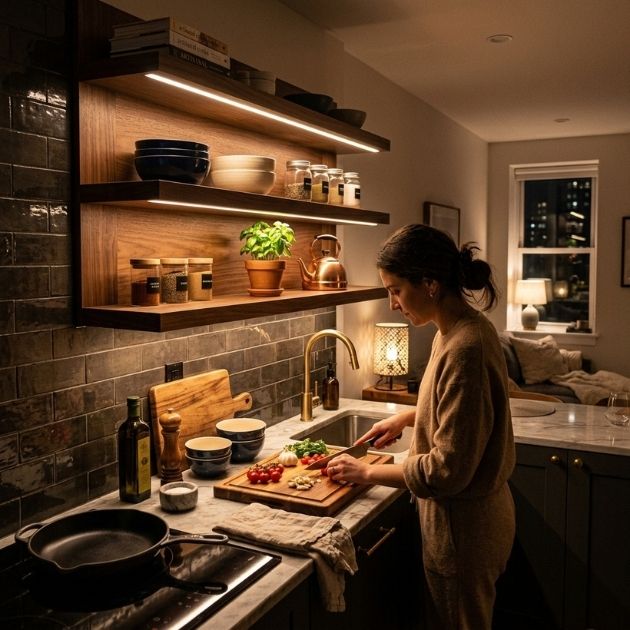
Poor lighting is one of the main reasons small kitchens feel cramped and uninviting. Overhead lights create shadows on the counters where you actually work. Under-shelf LED strips solve this by directing light exactly where you need it, onto the cutting board, the stove surface, and the sink.
Beyond function, task lighting under shelves adds a warm, layered glow that makes the entire kitchen look larger and more polished. LED strips are energy-efficient, generate minimal heat, and are easy to install even in rentals using adhesive-backed versions.
Check if these fit your needs:
- Plug-in LED strip lights with a dimmer switch for adjustable brightness
- Hardwired puck lights for a cleaner built-in appearance
- Motion-activated under-cabinet lights for convenience
- Battery-operated tap lights for areas without a nearby outlet
Hide Small Appliances in One Spot
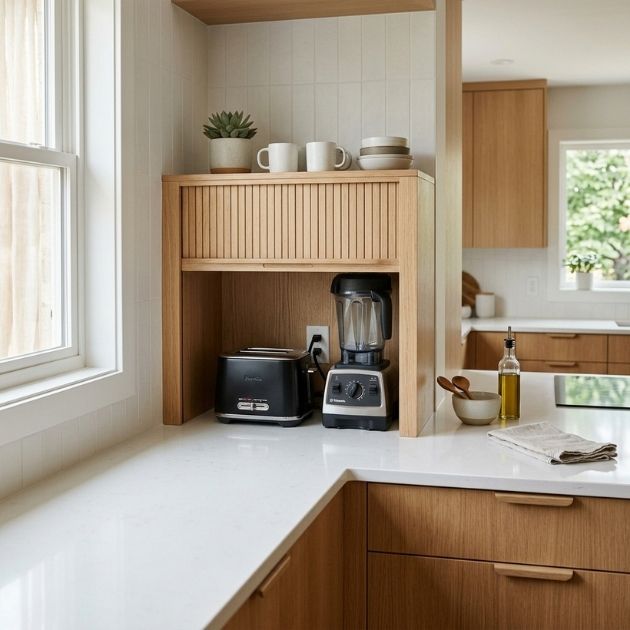
Countertop clutter is the enemy of a small kitchen. When a toaster, coffee maker, blender, and air fryer all compete for counter space, even a well-designed compact kitchen starts to feel chaotic. The solution is to designate one dedicated appliance zone and keep everything else stored away.
A deep drawer, a pull-out pantry shelf, or an appliance garage with a roll-up door can house all your small appliances in one organized spot. When a single appliance comes out to be used, the counter still feels manageable. Many urban kitchen designers refer to this as the “one-out rule.”
Check these products out:
- A roll-up appliance garage cabinet insert that fits standard upper cabinets
- Appliance lift mechanisms that bring a stand mixer or blender up from a base cabinet
- Deep drawer organizers sized for compact kitchen appliances
- A dedicated appliance cart with a closed lower shelf and open countertop
Choose a Compact Sink, Not a Tiny One
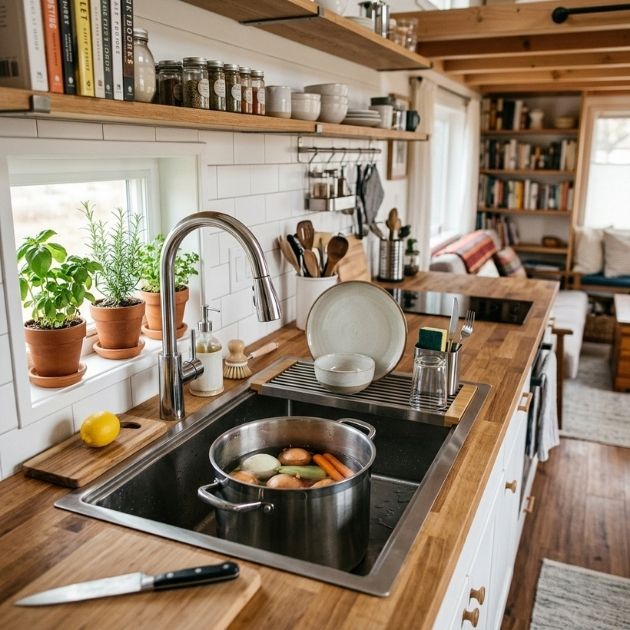
There is a difference between a compact sink and a tiny one. A tiny sink, often seen in efficiency kitchens, makes daily dishwashing miserable. A compact sink, designed with smart interior proportions, gives you the depth and basin size you need in a smaller overall footprint.
Bar sinks and prep sinks, typically 15 to 18 inches wide, are now available in deep single-basin configurations that handle full pots and cutting boards without requiring a large counter cutout. Pairing one with a pull-out faucet adds significant versatility in a small space.
A few suggestions:
- A 15-inch undermount stainless steel sink with a 7-inch depth
- A single-basin farmhouse-style compact sink for a more traditional look
- A wall-mounted folding drying rack that extends over the sink and folds flat
- A pull-down faucet with a high-arc spout to accommodate large pots
Turn a Corner Into an L-Shape
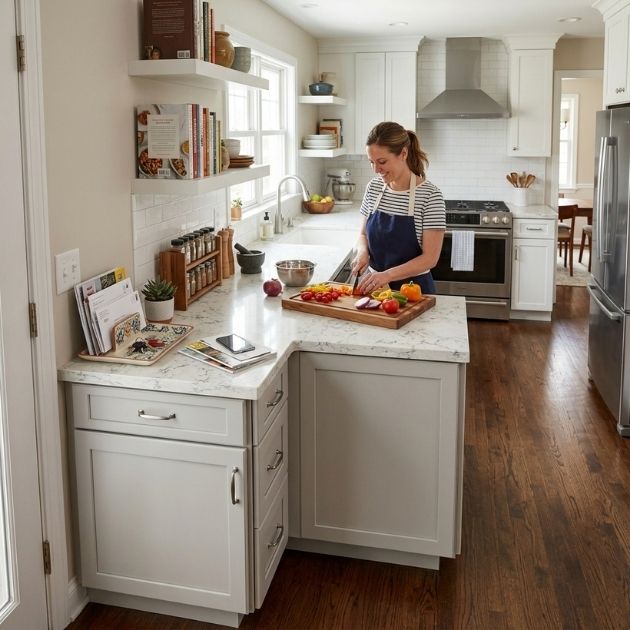
If your studio has two adjacent walls available, even short ones, an L-shaped kitchen layout unlocks a surprisingly usable cooking triangle. The corner where the two walls meet is often wasted in other layouts but in an L-shape, it becomes prime cabinet space when fitted with a lazy Susan or pull-out corner unit.
This layout naturally separates the kitchen from the living zone without requiring a wall or divider. It also gives you more linear counter space than a single-wall kitchen of the same square footage, making it one of the most efficient options for small studio floor plans.
Possibly helpful picks:
- A full-circle lazy Susan insert for corner base cabinets
- Corner drawer systems that replace traditional blind corner cabinets
- An L-shaped countertop in a single continuous piece to minimize seams and visual interruption
- A corner sink configuration that frees up both adjacent walls for appliances and storage
Try a Mirror or Glossy Backsplash
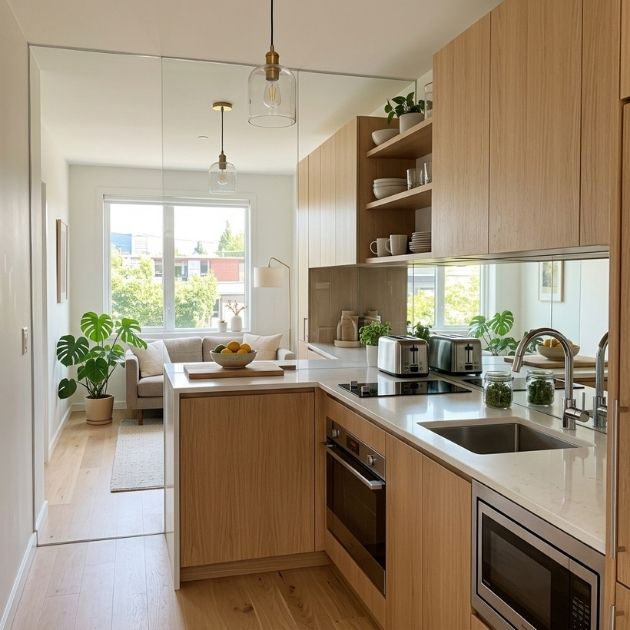
Light manipulation is one of the most effective tools in small space design, and a mirror or high-gloss backsplash does this better than almost anything else in the kitchen. Mirrored subway tiles, polished marble, or high-gloss lacquered panels bounce light around the room and visually double the perceived depth of the space.
This works particularly well in windowless kitchens or north-facing studios that get limited natural light. The reflection also creates the impression of more counter space and more depth, which is especially helpful in a kitchen with limited room to expand.
Useful items to consider:
- Mirrored subway tiles in a classic brick pattern for a timeless look
- High-gloss white lacquered panels cut to fit as a seamless backsplash
- Brushed metallic peel-and-stick tile sheets for a renter-friendly version
- A strip of mirror film applied to the wall above the countertop as a simple DIY option
Swap Some Doors for a Curtain
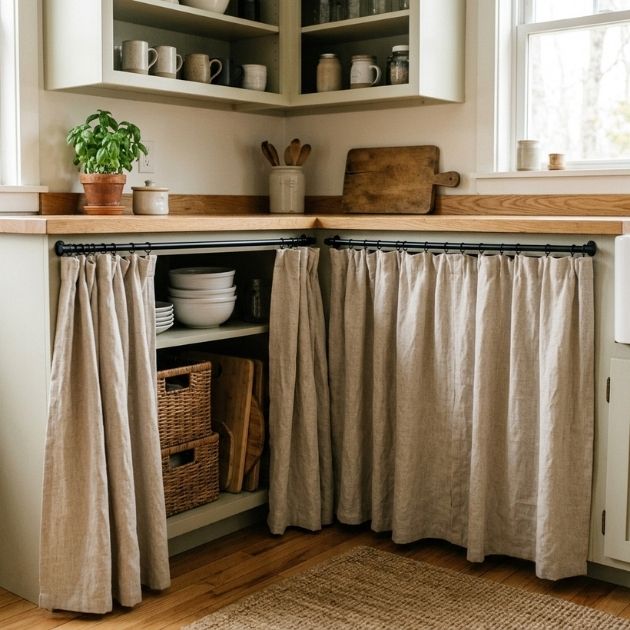
Cabinet doors, especially in lower cabinets, can feel visually heavy and physically awkward in tight kitchen layouts. Replacing some of them with a simple linen or cotton curtain softens the look, takes up zero clearance space when open, and adds an unexpected design layer that makes a studio kitchen feel less utilitarian.
This approach also works well under an open shelf or a countertop peninsula where a traditional door would swing into a walkway. Choose a curtain in a natural fabric that complements the cabinet color, and use a slim tension rod mounted inside the frame so no hardware is visible.
Maybe worth checking out:
- IKEA VIDGA curtain systems for a track-mounted solution inside cabinets
- Linen curtain fabric by the yard in natural or dyed tones for a custom fit
- Tension rods in matte black or brass to match existing hardware finishes
- Clip-on rings for attaching fabric to a rod without sewing or hemming
Steal Space Above a Doorway
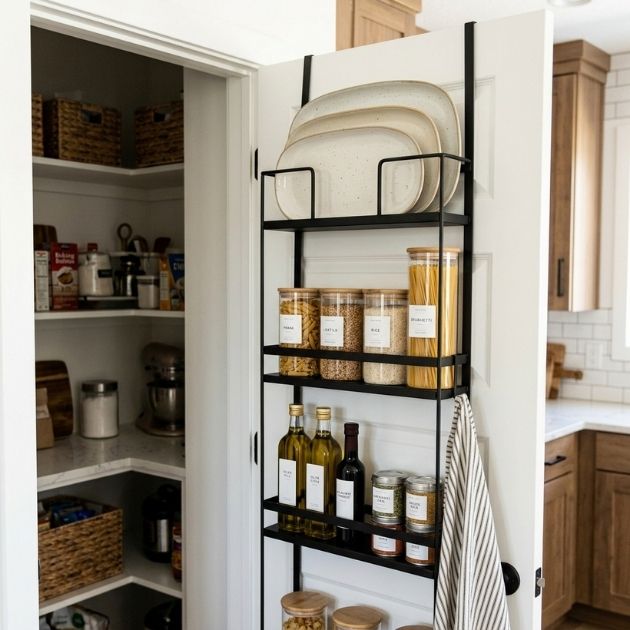
Most studio kitchens overlook one of the most underused storage spots in the apartment: the space above the doorway. A shelf mounted just above the door frame can hold items used occasionally but not daily, like serving platters, large mixing bowls, extra canned goods, or kitchen tools that only come out for special meals.
Keep the shelf the same color as the wall so it blends in rather than feeling added on. Use matching baskets or bins to keep the look clean and the items contained. In a studio kitchen where every inch matters, this overlooked zone adds meaningful storage without touching the actual kitchen footprint.
You might like:
- Floating solid wood shelves cut to the exact width of the doorway opening
- Wicker or rattan bins in a uniform size to store items neatly
- Metal grid wall organizers mounted above the door for a more industrial look
- Labeled fabric bins to keep the over-door shelf visually calm and organized
Final Thoughts
A compact studio kitchen is not a limitation. It is a design challenge that, when approached with the right ideas, produces spaces that are surprisingly functional, genuinely stylish, and deeply personal. The strategies above, from nook kitchens and L-shaped layouts to mirror backsplashes and doorway shelves, all share one common thread: they treat every surface, every corner, and every inch of vertical space as an opportunity rather than a problem.
Start with the layout, then address lighting, then work on storage layer by layer. You do not need to implement every idea at once. Even two or three well-chosen changes can transform a frustrating kitchen into one you actually enjoy cooking in.
Small does not mean limited. It just means more intentional.